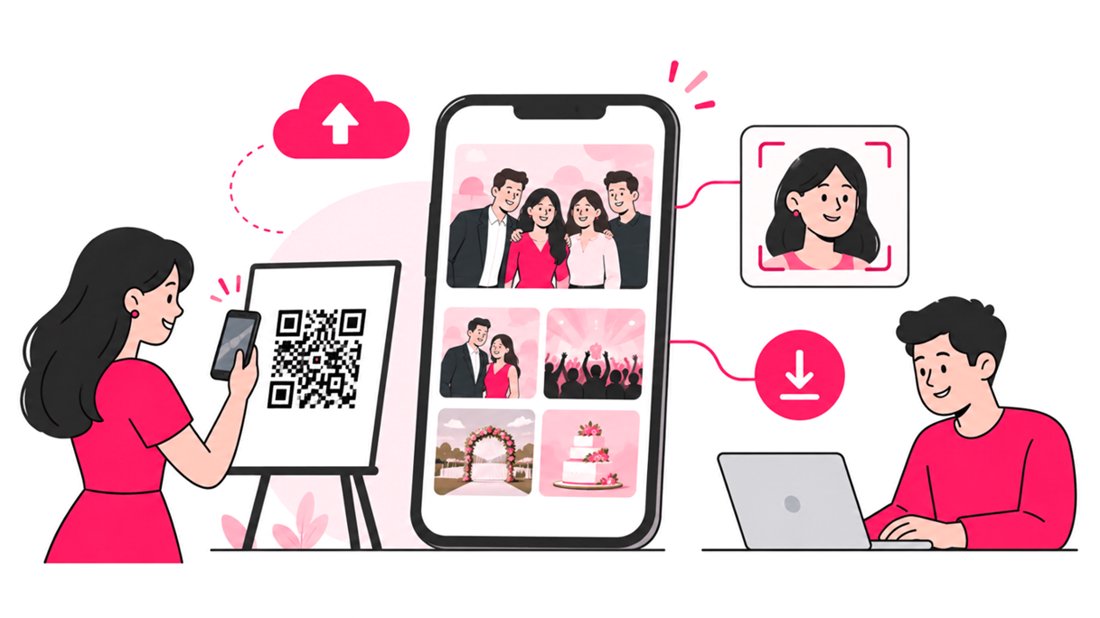
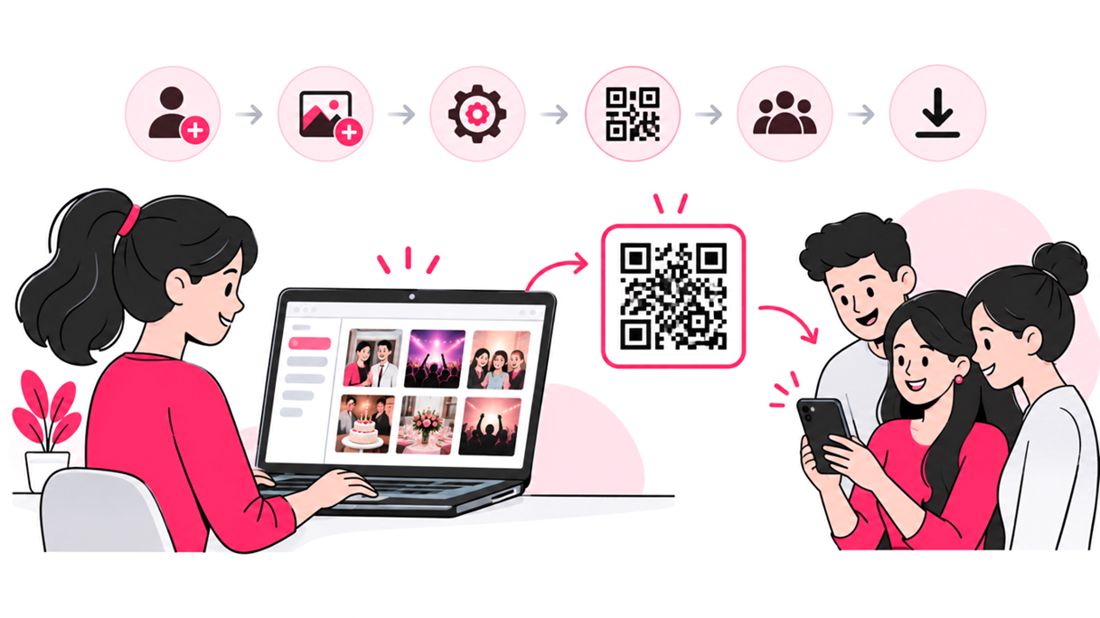
To set up SnapSeek for your first event, create an account, start a collection for the event, organize photos into folders, configure guest visibility and contributor access, add your branding and watermark, upload photos, then share the collection link or QR code. Guests can open the collection on their phones, find photos grouped using face recognition, and view or download the images according to the settings you choose.
A clear setup makes event photo sharing easier for photographers, planners, hosts, and guests. This guide walks through the workflow from account creation to the guest download experience.
Before You Start: Plan Your Event Photo Gallery
Spend a few minutes deciding how you want guests to access the photos. A wedding, school event, conference, tour, and corporate celebration may need different folder structures and privacy settings.
Make these decisions before uploading:
- Who should see the photos? Decide whether guests should browse all uploaded photos or focus on photos matched to them.
- Who can upload? Choose whether you will upload everything yourself or invite trusted contributors.
- How should the gallery look? Prepare your logo and decide whether to watermark photos.
- How will guests access it? A QR code works well on printed signs, while a direct link is useful for email, messaging, and event websites.
- How will photos be organized? Plan folders around event days, activities, locations, or sessions.
Mobile access matters. Pew Research Center reported in its 2026 mobile-device fact sheet that 91% of U.S. adults own a smartphone. That is one reason to make your photo-sharing experience simple to open and use on a phone. The figure is U.S.-specific, so treat it as context rather than a universal estimate.
Step 1: Sign Up for SnapSeek
Start at SnapSeek.app and create your account by following the on-screen sign-up process.
Once you are in your account, take a moment to become familiar with the collection and photo-upload workflow. SnapSeek is designed for browser-based sharing, so guests can access a shared collection through a link or QR code without needing to install a separate app or create an account.
First-time setup checklist
- Sign in and confirm you can access your workspace.
- Prepare the event name and any event details you want to use.
- Have a high-quality version of your brand or client logo ready.
- Identify the people who may need permission to contribute photos.
- Confirm that you have permission to share the images with the intended audience.
Step 2: Create a Collection for the Event
A collection is the main gallery for your event. Create one collection for each event or clearly separated project so photos and guest access stay organized.
- Open the collection-creation option in your SnapSeek account.
- Give the collection a recognizable name, such as “Maya and Alex Wedding,” “Summer Camp 2026,” or “Toronto Partner Summit.”
- Review the available collection settings before sharing it.
- Save the collection and open it to continue configuring the gallery.
Use a name guests will understand. If you are managing several events, include a date, venue, tour name, or other distinguishing detail.
For recurring events, keep a consistent naming convention. For example, a photography team could use the event name followed by the date. This makes it easier for staff to identify the correct gallery and reduces the chance of sharing the wrong link.
Step 3: Create Folders to Organize Photos
Folders help structure a large event gallery so it is easier to browse. Set them up before uploading if you already know how the final gallery should be arranged.
Choose a structure that reflects how the event happened:
| Event type | Example folder structure |
|---|---|
| Wedding | Ceremony, Couple Portraits, Family, Reception |
| Conference | Keynote, Breakout Sessions, Networking, Awards |
| School or camp | Day 1, Outdoor Activities, Performances, Group Photos |
| Tour or excursion | Location, Date, Activity, Group |
| Corporate event | Speakers, Team Photos, Product Demos, Celebration |
Create only as many folders as you need. Too many narrow categories can make a gallery harder to navigate, especially on a phone.
If you want guests to browse a single gallery without needing to choose a person first, review the guest settings later in this guide. Folder organization and person-based discovery serve different purposes, so decide which navigation style makes sense for your event.
Step 4: Configure Guest Visibility and Access
Guest settings shape the photo-sharing experience. Before distributing a QR code or link, decide whether guests should be able to browse the complete gallery or primarily find photos associated with them.
SnapSeek supports a setting to show or hide person avatars in the guest view. Review “Collections Settings” > “Guest Settings”.
Use this decision guide:
| Guest experience | Setting approach |
|---|---|
| Guests should browse the event gallery as a whole | Turn off person avatars if you do not want person-based navigation |
| Guests should find photos associated with them | Keep person avatars visible if that discovery experience suits the event |
| Photos are intended for a limited audience | Review the collection’s available access and privacy controls before sharing |
| The event includes sensitive or private moments | Share only with the intended audience and explain how the gallery will be used |
Face recognition can make it easier for guests to find relevant event photos, but it does not replace your responsibility to manage consent and access. Tell attendees how photos will be shared, follow applicable privacy requirements, and avoid uploading images you are not authorized to distribute.
Before the event, test the guest-facing view so you know what people will see when they open the link.
Step 5: Invite Contributors, If Needed
If several photographers or team members are collecting images, contributors can help bring photos into the same event collection. SnapSeek supports up to 10 contributors who can add or upload photos.
To prepare contributor access:
- Identify the people who genuinely need upload access.
- Open the relevant collection’s contributor controls.
- Add the intended contributors using the available invitation process.
- Explain which event or activity they should cover.
- Ask contributors to follow the agreed folder and file-naming structure.
Give access only to people you trust to upload appropriate images. For a large event, assign clear responsibilities so contributors do not all upload the same batch or leave important sessions uncovered.
If you are the sole photographer, you can skip this step and manage uploads yourself.
Step 6: Add Branding, Logos, and Watermarks
Branding makes a photo gallery feel consistent with your photography business, event, or client identity. Prepare your visual assets before publishing the gallery.
Add your logo
Use the relevant branding or logo controls available in SnapSeek to add your logo where supported. Choose a clean, high-resolution logo with enough contrast to remain recognizable at a small size.
Check the result on both desktop and mobile. A logo that looks clear on a large screen may be difficult to recognize on a phone.
Configure photo watermarks
If you want to identify your photography business or discourage casual reuse of preview images, configure a watermark before sharing the photos. SnapSeek supports up to two watermark logos.
- Use a logo that remains legible without distracting from the image.
- Check placement against both light and dark photographs.
- Apply the watermark consistently across the gallery.
- Review a sample image before processing the full upload.
A watermark is a branding measure, not a complete copyright or download-control solution. Keep original files backed up separately and make sure the gallery settings match your delivery agreement with the client.
Step 7: Upload Photos to the Collection
Once the collection structure and settings are ready, upload the event images.
- Open the correct collection.
- Choose the upload option and select the photos you want to share.
- Confirm that the photos appear in the gallery.
- Move or organize images into the relevant folders where appropriate.
- Review a sample of images for orientation, quality, and correct placement.
SnapSeek applies AI face recognition to uploads by default, helping organize discovery around people without requiring you to manually tag every photo. Face recognition is included in the standard workflow and does not require an additional face-recognition charge.
For a large event, upload in manageable batches and verify each batch before moving on. Keep a separate backup of the original images. A photo-sharing gallery should be part of your delivery workflow, not your only copy of important event photography.
If your event uses Google Drive as part of its workflow, check the available Google Drive import option in SnapSeek rather than manually downloading and re-uploading files when an import is suitable.
Step 8: Test the Gallery Before Sharing It
Do not distribute the collection link until you have checked the experience from a guest’s perspective.
Use this pre-launch checklist:
- The collection name identifies the right event.
- Folders are easy to understand.
- The expected photos have finished uploading.
- Guest visibility matches your intended experience.
- Person avatars are either shown or hidden as planned.
- Logos and watermarks look correct.
- Contributor access is limited to the people who need it.
- The gallery opens properly on a phone.
- You understand which photos guests can view and download.
If possible, ask a colleague to open the gallery as a guest and tell you whether the next step is obvious. A short test can catch confusing folder names, missing photos, or an unexpected guest view before the link reaches hundreds of attendees.
Step 9: Share the QR Code or Collection Link
After checking the gallery, share it using the method that best suits your event.
Share a QR code
A QR code is useful when guests are already at the venue and you want them to access the gallery without typing a URL.
- Add the code to welcome signage, table cards, event programs, or a photo booth area.
- Include a short instruction such as “Scan to view event photos.”
- Print the code large enough to scan comfortably.
- Test the printed version from a typical viewing distance.
- Make sure the code points to the correct collection.
Share a direct link
A link works well for invitations, post-event emails, group chats, newsletters, and event websites. Copy the collection’s share link from SnapSeek and place it in the message you send to attendees.
Tell guests what they can do after opening the link. For example, explain that they can browse the gallery, find photos, and download images where those options are available.
| Sharing method | Best use | Practical tip |
|---|---|---|
| QR code | Venue signage and printed materials | Test the printed code before the event begins |
| Direct link | Email, messaging, and event websites | Use a short, clear call to action |
| Both | Events with in-person and remote guests | Keep the QR code and link connected to the same intended collection |
Avoid posting a gallery link publicly if the photos are intended only for a defined group. Choose distribution channels that match the privacy expectations of the event.
Step 10: What Guests See and How They Download Photos
Once guests scan the QR code or open the link, they can access the collection in their browser. They do not need to install a separate app or create an account just to view the shared collection.
The guest journey generally looks like this:
- Open the gallery. The guest scans the QR code or taps the shared link.
- Browse the collection. They explore the event photos and folders available to them.
- Click a selfie. They click a selfie and the photos with the face matching that selfie appear.
- Open an image. They select a photo they want to view.
- Download the photo. They use the available download control to save the image to their device.
If a guest cannot find an image, first check that the photo uploaded successfully and that the guest is looking in the right collection or folder. If you changed visibility settings, re-open the guest view to confirm the change has the expected effect.
Step 11: Manage the Gallery After the Event
Photo sharing does not have to end when the event finishes. Keep the collection organized and communicate any relevant information about access and retention.
- Upload any approved late-arriving photos.
- Check folder names and remove accidental duplicates where needed.
- Respond to guest questions about finding and downloading images.
- Review contributor access and remove access that is no longer needed, where the controls allow it.
- Keep your original image backup in a separate location.
- Tell guests how long the gallery is expected to remain available.
SnapSeek’s default retention period for photos and biometrics is one year. Collection owners can extend that period or delete the data earlier. Make retention expectations clear to clients and guests, especially when the event involves children, private gatherings, or sensitive activities.
SnapSeek Setup Checklist at a Glance
| Stage | What to complete |
|---|---|
| Account | Sign up and access your workspace |
| Collection | Create and name the event gallery |
| Organization | Create folders for days, activities, or sessions |
| Guest settings | Decide whether person avatars should appear and review access settings |
| Contributors | Invite only the people who need upload access, up to 10 |
| Branding | Add supported logos and configure up to two watermark logos if needed |
| Upload | Upload, verify, and organize event photos |
| Quality check | Test the gallery from a guest’s point of view |
| Sharing | Copy the collection link and prepare the QR code |
| Guest experience | Confirm guests can browse and download as expected |
| After the event | Maintain the gallery, communicate retention, and keep backups |
FAQ
How do I set up SnapSeek for my first event?
Create a SnapSeek account, create a collection for the event, add folders, configure guest settings, invite contributors if needed, set up branding and watermarks, upload photos, and test the guest view before sharing a QR code or link.
Do guests need to download an app to view SnapSeek photos?
No. Guests can open a shared SnapSeek collection in a web browser using the collection link or QR code. They do not need to install a separate app or create an account just to view the shared collection.
Can I organize event photos into folders in SnapSeek?
Yes. Use folders to organize photos by event segment, date, location, activity, or session. A simple structure makes it easier for guests to browse a large gallery.
Can multiple photographers upload to one SnapSeek collection?
Yes. SnapSeek supports up to 10 contributors who can add or upload photos. Invite only the people who need access and agree on a shared organization process before the event.
Can I add my business logo or watermark to event photos?
SnapSeek supports branding options, including up to two watermark logos. Configure the available branding controls and preview the result before sharing the gallery.
Can guests find photos of themselves?
SnapSeek applies AI face recognition to uploads by default, helping guests discover photos associated with people. You can also configure whether person avatars appear in the guest view. Choose the visibility setting that best fits the event and its privacy expectations.
How do I share SnapSeek photos with event guests?
Share the collection link in email, messaging apps, or an event website. For in-person events, provide the collection QR code on signs or printed materials. Test both methods before distributing them.
How long are photos stored in SnapSeek?
Photos and biometrics are deleted by default after one year. Collection owners can extend the retention period or delete the data earlier. Check the current settings and communicate the retention plan to the event organizer.
Conclusion
A successful event photo-sharing workflow starts with a well-organized collection, clear guest settings, consistent branding, and a simple way to access the gallery. By testing uploads and the guest experience before distributing the link, photographers and event organizers can reduce confusion and make it easier for attendees to find and download memorable moments.
Set up your next event gallery with SnapSeek, organize your photos, and share them with guests through a link or QR code.